
GoHighLevel Webhooks: Inbound vs Outbound, Authentication, Testing and Common Errors
Here is the simple webhook rule I use: inbound brings data into a GoHighLevel workflow, while outbound sends data from HighLevel to another system. The direction is simple. The reliable setup still needs the correct method, authentication, payload, test data, logging and duplicate protection.
But this is where people often expect too much from one request: a webhook is an event-triggered HTTP request, not a continuing database sync. If you need updates in both directions, define a separate event and data flow for each direction.
Before testing the payload, choose the right API V2 authentication method and decide where data belongs using the custom fields and objects guide. If the webhook reaches HighLevel but nothing happens, switch to the workflow-not-firing checklist. For Meta leads, also verify the Facebook Lead Forms connection.
First, separate inbound from outbound webhooks
| Question | Inbound webhook | Outbound webhook |
|---|---|---|
| Where does the event start? | External application | HighLevel workflow |
| Where does the request go? | HighLevel-generated URL | External endpoint URL |
| Typical use | Receive an order, registration, or support event | Send a qualified lead, appointment, or status update |
| HighLevel component | Workflow trigger | Webhook or Custom Webhook action |
| Main setup risk | Untrusted or unstable input data | Wrong method, auth, URL, or body |
Example: Shopify sends a paid-order event into an inbound HighLevel workflow. HighLevel finds or creates the contact, updates an opportunity, then uses an outbound webhook to send the fulfillment details to a separate operations system.
Choose between Webhook and Custom Webhook actions
HighLevel provides an outbound Webhook action and a more configurable Custom Webhook action.
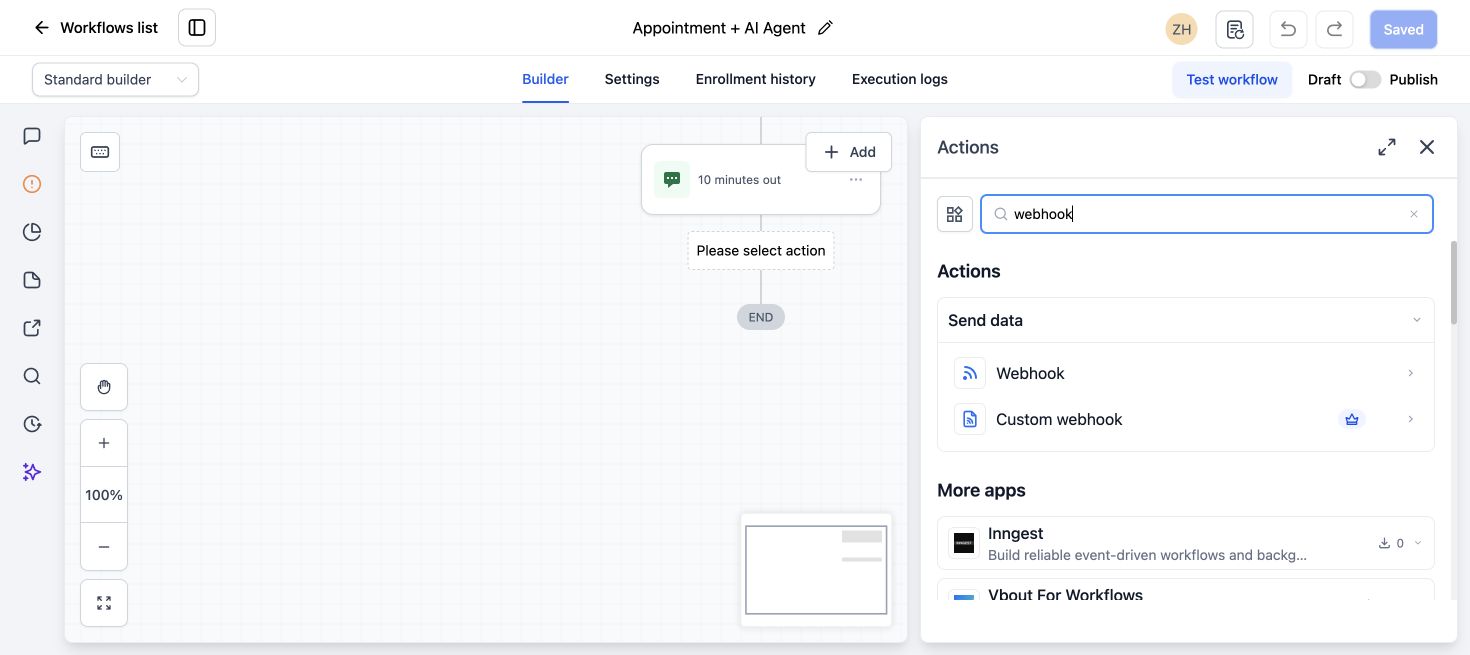
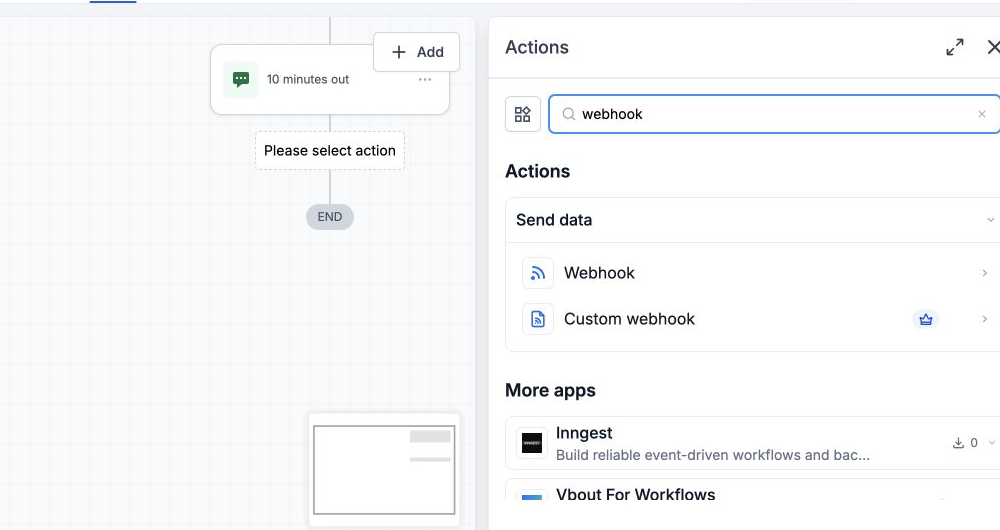
Use the standard Webhook action when the destination accepts a straightforward request and the default contact or trigger data is suitable.
Use Custom Webhook when you need:
- GET, POST, PUT, or DELETE.
- Bearer token, API key, Basic Auth, OAuth2, or custom headers.
- Query parameters.
- A specific JSON or form-encoded body.
- A controlled field map.
- A response value for later workflow steps, where supported.
HighLevel’s Custom Webhook guide recommends placing secrets in headers instead of URLs and matching the destination API’s method and Content-Type exactly.
Plan the contract before building the workflow
Write down the request contract in plain language:
- Which event starts the request?
- Which record is being sent or received?
- Which fields are required?
- What uniquely identifies the record?
- Which authentication method is required?
- What should a successful response look like?
- What should happen after a timeout or failure?
- How will duplicate events be recognized?
This prevents a workflow that “works” in a test but creates duplicate contacts, overwrites the wrong opportunity, or silently drops an error in production.
Set up an outbound GoHighLevel webhook
Step 1: Start with the right workflow trigger
Go to Automation > Workflows and create or open the workflow. Choose a trigger that contains the object context you need.
For example, an Appointment Status trigger can provide appointment context. A Contact Tag trigger will not automatically provide a specific appointment or opportunity merely because the contact has one.
HighLevel’s outbound webhook documentation notes that the payload can depend on the trigger that started the workflow.
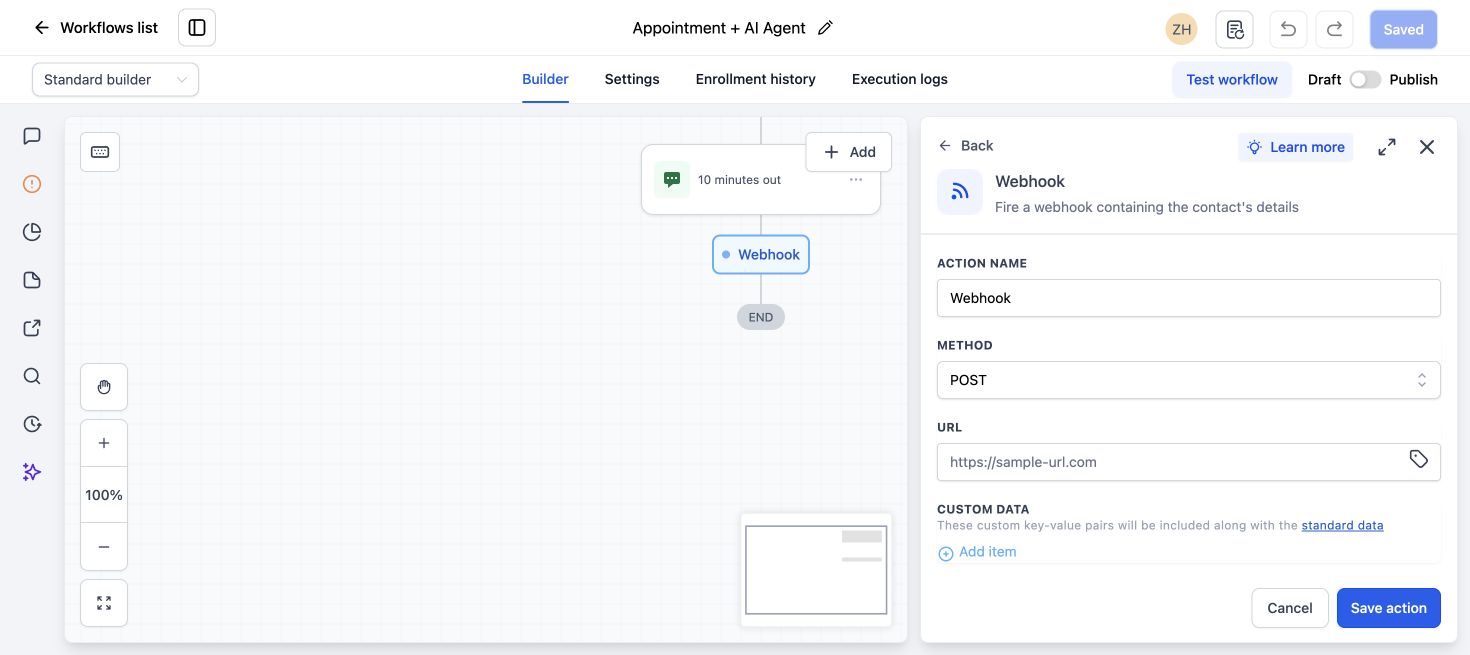
Step 2: Add the Custom Webhook action
Click the plus icon, search for Custom Webhook, and give the action a name that states the destination and purpose, such as Send Won Opportunity to Fulfillment.
Step 3: Match the endpoint’s HTTP method
- GET: Retrieve data. Put filters in query parameters.
- POST: Create a record or submit an event.
- PUT: Update a known record.
- DELETE: Remove a known record only when the process explicitly requires it.
Do not use POST simply because it is the default. Use the method in the receiving API’s current documentation.
Step 4: Configure authentication
Common patterns include:
Authorization: Bearer {{location.external_api_token}}or:
X-API-Key: {{location.external_api_key}}Store credentials in an appropriate secret or reusable location value when the feature and security model allow it. Never paste a live token into an article screenshot, workflow name, query string, or error report.
For OAuth2, configure and select the managed token according to the provider’s requirements. Confirm scopes as well as the token itself. A valid token without the required scope can still return 403.
Step 5: Set Content-Type and body
If the provider expects JSON, use application/json and match its field names and data types.
Example:
{
  "event_id": "opp_{{opportunity.id}}_won",
  "contact_id": "{{contact.id}}",
  "email": "{{contact.email}}",
  "opportunity_id": "{{opportunity.id}}",
  "status": "won"
}
The example uses an event ID so the receiver can reject or ignore an accidental duplicate. Replace the merge fields with values available in the actual workflow context.
Step 6: Test before publishing
Send the request to a temporary request inspector or a controlled staging endpoint. Check:
- Method.
- Final URL.
- Headers.
- Content-Type.
- JSON syntax.
- Required values.
- Empty or null fields.
- Response code and body.
Use a test contact with fake data and remove the temporary endpoint before publishing the production workflow.
Set up an inbound GoHighLevel webhook
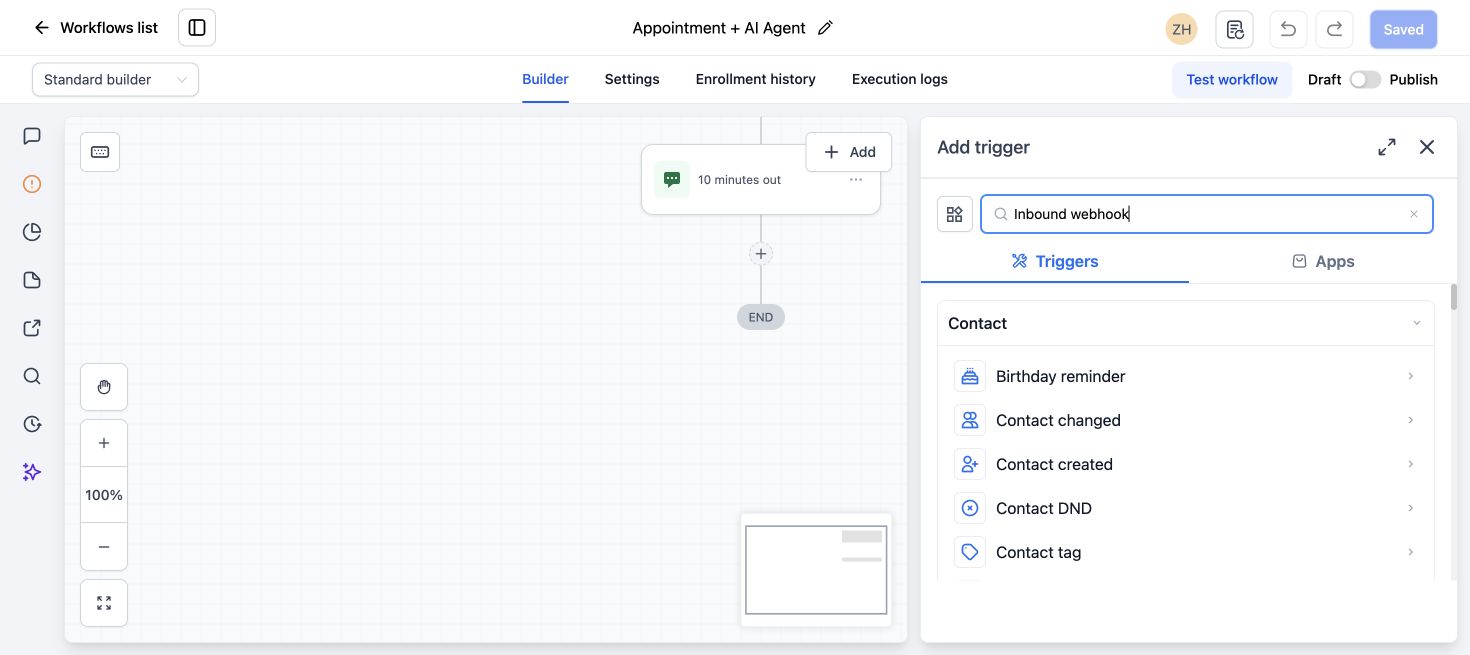
Step 1: Add the Inbound Webhook trigger
Create a workflow and select Inbound Webhook as the trigger. Copy the generated URL and treat it as sensitive. Anyone who can call an unprotected URL may be able to start the workflow.
Step 2: Send representative sample JSON
Send a test request from the external application or a safe API client, then click Test Trigger and select the received sample.
Example:
{
  "event_id": "order_8472_paid",
  "event_type": "order.paid",
  "customer_email": "te**@*****le.com",
  "customer_phone": "+14155550112",
  "order_id": "8472",
  "order_total": 249.00
}
Use keys without spaces. HighLevel’s Inbound Webhook guide says JSON objects are supported and that arrays can be received but are not available as normal custom values inside later actions.
Step 3: Save the mapping reference
Choose the correct captured request and save it as the mapping reference. HighLevel then exposes the sample fields as values for later workflow actions.
If the sender changes the payload structure later, return to the trigger and capture a new mapping reference. A workflow cannot map a new nested key that did not exist in the saved sample.
Step 4: Find or create the contact only when needed
If the workflow needs contact-dependent actions, use the incoming email, phone, Contact ID, or a supported Find/Create action to locate the right record. Do not create a second contact for every repeat event.
HighLevel also supports contactless inbound workflows for actions that do not require a contact. For example, an order event can be routed to a Google Sheet, Slack, an internal tool, or another webhook without first creating a CRM contact.
Step 5: Validate and branch before acting
Add checks for:
- Expected
event_type. - Required identifier present.
- Amount or status in an allowed format.
- Duplicate
event_idalready processed. - Test mode versus live mode.
Do not send a customer message or update a live opportunity directly from unvalidated inbound data.
Authentication and security patterns
The sender and receiver should agree on an authentication method. Depending on the systems, that can include:
- Bearer token.
- API key header.
- Basic Auth over HTTPS.
- OAuth2.
- Signed request header or HMAC verified by middleware.
- An unguessable URL combined with network or middleware controls.
HighLevel’s inbound workflow URL alone is not a complete validation strategy for high-risk events. If the trigger cannot verify the sender in the way you need, place a controlled middleware endpoint in front of it. The middleware can verify a signature, validate the schema, remove sensitive fields, and forward only approved events.
Never log full access tokens, passwords, payment data, or protected health information for convenience. Use the minimum fields the workflow needs.
Test the complete behavior
A successful 200 response proves only that the endpoint accepted the request. Test the business result as well.
For an outbound webhook:
- Trigger the workflow with a test contact or opportunity.
- Confirm the workflow reached the webhook step.
- Inspect the received payload.
- Confirm the external system created or updated the intended record once.
- Trigger the same event again and verify duplicate handling.
For an inbound webhook:
- Send a valid sample.
- Send the same event ID twice.
- Send a request missing a required field.
- Send an unexpected event type.
- Confirm only the valid, unique event performs the action.
Common HTTP errors
| Response | Meaning to investigate | Practical fix |
|---|---|---|
| 400 Bad Request | Invalid syntax or missing required field | Compare the exact body with the provider schema |
| 401 Unauthorized | Missing, expired, or malformed credential | Recreate or correct the token and Authorization format |
| 403 Forbidden | Credential lacks permission or access is blocked | Check scopes, account access, allowlists, and resource ownership |
| 404 Not Found | Wrong endpoint or missing record ID | Confirm base URL, version, path, and dynamic ID |
| 409 Conflict | Duplicate or state conflict | Add idempotency or use the provider’s upsert rule |
| 422 Unprocessable Entity | Valid JSON with unacceptable field values or types | Match field names, allowed values, and data types |
| 429 Too Many Requests | Rate limit exceeded | Reduce volume, batch safely, or retry according to provider guidance |
| 5xx | Receiving service failed | Log the request ID and retry according to a controlled backoff policy |
Also investigate timeouts. The receiver can complete an action after HighLevel times out, so a blind retry may create a duplicate unless the destination uses a stable event ID.
Use logs to find the failing layer
Check the HighLevel workflow execution log to confirm that the contact entered, the expected branch ran, and the webhook action executed. Review the returned status and available response details.
For developer-platform webhooks, HighLevel also provides a Webhook Logs dashboard under Developer Portal > Insights > Logs. The current guide describes payload, response, attempt, retry, and status-code visibility for supported outbound events.
Keep a troubleshooting record with:
- Event time and time zone.
- Test contact, order, or opportunity ID.
- Workflow execution ID.
- Destination request ID.
- HTTP status.
- Sanitized request and response.
That evidence shows whether the trigger, mapping, authentication, receiver, or downstream action failed.
What to do next
Build one narrow integration first. Define the event, identifiers, body, success response, duplicate rule, and failure owner. After it passes valid, duplicate, invalid, and timeout tests, publish it and monitor the first live events.
Frequently asked questions
Is an inbound webhook the same as the HighLevel API?
No. An inbound webhook starts a predefined workflow using a received request. The API exposes authenticated endpoints for broader record operations. Choose the API when the external application needs direct and repeatable CRUD access.
Should I use Webhook or Custom Webhook in a workflow?
Use Custom Webhook when the destination requires a specific HTTP method, authentication, headers, query parameters, or JSON body. Use the simpler action only when its payload matches the receiver’s requirements.
Why is my opportunity data missing from the outbound payload?
The workflow may not have opportunity context. Start with an opportunity-related trigger or explicitly find the required opportunity before building the payload.
Can an inbound webhook run without a contact?
Yes, supported contactless workflows can use actions that do not depend on a contact. If you need contact messages, opportunities, or contact fields, find or create the contact using a reliable identifier first.
How do I stop duplicate webhook processing?
Send a stable event ID and make the receiver store or reject IDs it has already processed. Do not depend on the contact’s email alone, because one person can legitimately generate several different events.
Need a webhook that is testable after handoff?
We can map the event, payload, authentication, error handling, logs and handoff documentation for your HighLevel integration.
One Comment